A STEP-BY-STEP GUIDE TO MY CURRENT WINTER MORNING SKINCARE ROUTINE


A STEP-BY-STEP GUIDE TO MY CURRENT WINTER MORNING SKINCARE ROUTINE

CLEANSE:

I know people go back in forth about cleansing in the morning but I personally don’t wash my hair often so I know my pillowcase can get dirty & oily fairly quickly. I rarely use soap on my face, ESPECIALLY in the colder months. I use this oil cleanser from Sara Elizabeth. It’s a light oil and for me, oil cleansing keeps the oil at bay throughout the day. When you have dry skin, your skin produces more oil to overcompensate. When you wash your face with soap that’s drying, it does the same. If you have combination skin, I recommend trying to cleanse with an oil or balm in the morning. I use my hand or this face halo to wash off most of the oil. If you have drier skin, I recommend not fully washing off the oil.

TONE:

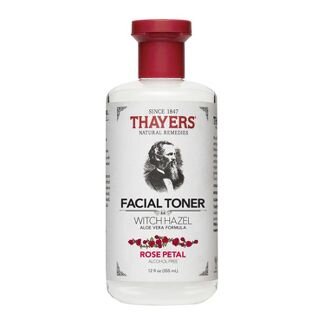
After cleansing, I’ll tone my face. I find it balances out my skin and makes sure it’s fully clean and ready for the next step. I’m not 100% committed to any specific toner but when I am, I’ll let you know! I recommend using a rose toner of some sort like this one by Heritage Store, this one by Glossier, or this one by Thayer’s if you’re acne-prone.

BRIGHTENING SERUM STEP 1 FOR ACNE SCAR PRONE (optional):

Let me preface this by saying I scar EXTREMELY easily. I had adult acne for 6 years (more on how I treated it here). After finally treating my acne, I was left with a ton of scarring and discoloration. I will take any precautions to prevent acne scars and dark spots. I use this from SkinCeuticals and I find it not only helps fade but prevents any discoloration. It’s pricey but I rather spend the money preventing it than much more $ treating it. I apply 3 small drops on my face so it lasts a while!

VITAMIN C:

Vitamin C is a MUST. It’s a powerful antioxidant that helps shield your skin from free radicals. Basically, it helps protect your skin against pollution, UVA & UVB rays. It’s a skin brightener and plays a huge roll in fading discoloration as well. My go-to Vitamin C serums have been this one from Drunk Elephant (it’s has a tacky feel and is great if you’re more oil-prone) & this one from Peter Thomas Roth.

EYE CREAM:

I’ll apply eye cream next. In the morning, I prefer a light, moisturizing one that absorbs nicely so my make up goes on smooth. I’ve been really into this one from Drunk Elephant. It has vitamin C so it’ll help brighten my under eye area as well.

HYALURONIC ACID:

Especially since this is my winter skincare routine, I MUST include HA. It’s played such a huge roll in hydrating and plumping my skin. It’s also very light so if you’re more oil-prone, you’re safe to use it! It’s basically like a drink of water for your face. I’m also obsessed with this one from The Ordinary and it’s only $7!

SELF TANNING DROPS (optional):

Love me a good self-tanner especially when it’s easy to use. I just add a few drops of this from Isle of Paradise to my moisturizer in the morning, mix and apply! I do this about twice a week. It really just adds a nice glow. It comes in light, medium, and dark. Not sure how long it will last but I found a set of them on major sale here.

OIL:

I need to preface this by saying if it wasn’t for this exact oil, I’d probably skip this step. I’m so obsessed with this vitamin C & turmeric face oil by Sunday Riley that I found a way to add it to my skincare routine. I add 2-3 VERY small drops. It helps with overall glow, hyperpigmentation, and dark spots. It’s a real winner, I must say.

MOISTURIZER:

In the summer months, I use a very light moisturizer. In the winter months, not so much. My night-time routine can be fairly drying for wintertime, so I like to add this extra step. I also find my makeup sits so much better when I do. I like this one by Drunk Elephant and this one by Kiehl’s. I know it’s pricey but I do have to mention how much I love this one by Rodial. It’s very luxurious. You can find a smaller size here to test out.

SPF:

I never skip SPF, rain, or shine. SPF is a huge game-changer for obvious reasons. The sun causes dark spots and makes my hyperpigmentation even worse so I never skip this step. I really like this tinted SPF primer by Sara Elizabeth. It has a very light and smooth feel. It also has color technology so it can adapt to anyone’s skin tone. Have oily skin? Try using an SPF primer like this one.


MY STRUGGLE WITH ADULT ACNE: ACNE SCARS EDITION


Thank you to Banish for sponsoring this post, all opinions are, of course, my own.

4T9A8872.jpg

So now that we’ve discussed how I cleared up my acne, it’s FINALLY time to talk about one of the hardest things I’ve ever gone through. You can read part one and part two to hear more about my struggle with acne & see some before photos. Yes, I always say I think dealing with hyperpigmentation and acne scars can be even harder than dealing with the actual acne. It sticks around for a lot longer. SO after 6 years of acne and finally figuring out what has been causing it, I was left with scars and hyperpigmentation. A LOT OF THEM. I had acne over acne so I literally had dents in my face. Fun stuff.

So here’s the thing, these things take time but there are ways to speed up the process. I’m really excited to share something that helped A LOT! Like game changer and it’s affordable! It’s super important for me to share with you guys products that work and at all price points. I totally get it, not everyone can afford laser. And even after any laser, it’s inevitable to get more hyperpigmentation & scarring if you break out from time to time. Which is definitely my case. I still break out here and there and they still leave marks.

4T9A8800.jpg
4T9A8853.jpg

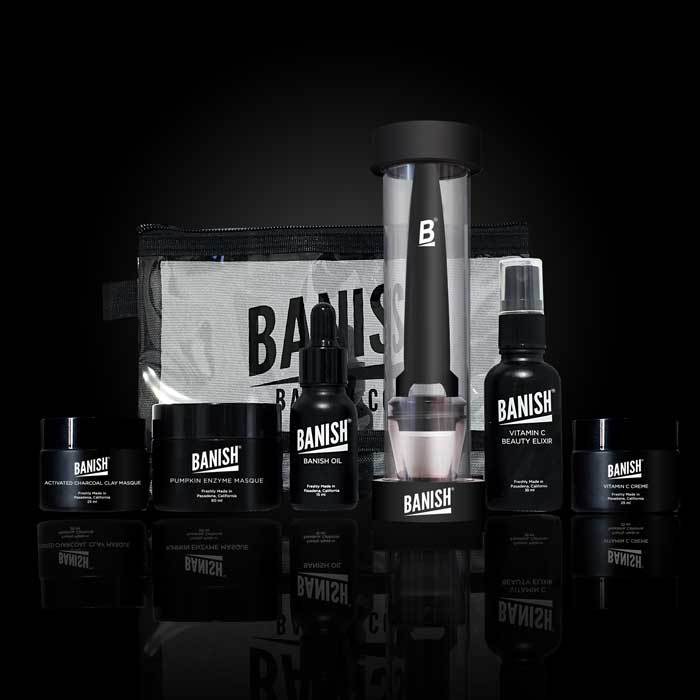
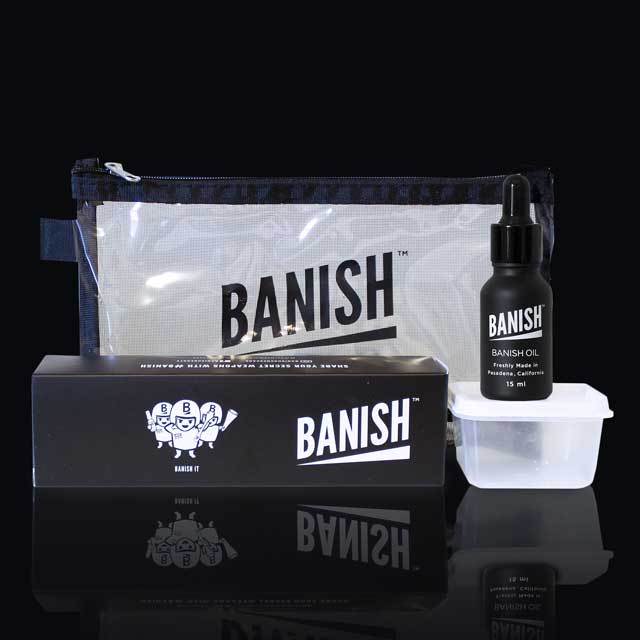
Everyone, meet Banish! It’s an amazing company that is known for their acne scarring diminisher. All the products are freshly made daily and are vegan and cruelty-free! I’ve been using Banish since the summer of 2009. I even looked up my first order to confirm because I don’t think there’s a product I’ve ever used longer. Their “Banisher” is seriously heaven-sent. It’s a micro-needling tool, which is a collagen inducing tool. Before I explain the product further, I want to mention the importance of cleaning the tool before & after each use. I soak the tool in rubbing alcohol for 30 minutes before and after. That ensures the tool is clean. Okay, so let’s get into it. My first purchase from Banish was their Banish Starter Kit (use the code ‘arielle’ for a discount)! It includes all of the following:

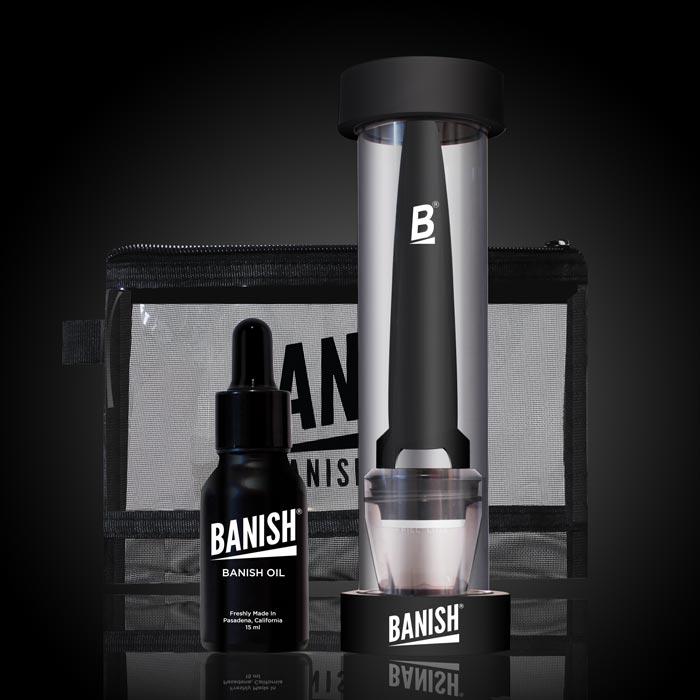
  • Banish Oil (vitamin c serum) It is their signature product and made with the most potent form of vitamin c: L-ascorbic acid. It’s proven to improve radiance and texture and reduce the look of acne scars and hyperpigmentation faster compared to other forms of Vitamin C.

  • Banisher 2.0, the tool that changed it all. Features gold plated titanium bristles which gives an additional collagen boost.

  • Vitamin C Beauty Elixir is the perfect pick me up when you need a boost of vitamin C and to add moisture back to your skin.

  • Pumpkin Enzyme Masque is made out of real pumpkin. Packed with AHAs & BHAs which are natural exfoliants. Two of my all-time favorite ingredients. It sloughs off dead skin cells and improves the texture of your skin AKA smooths out those indents in my face from all the acne.

  • Activated Charcoal Clay Masque is a powerful mask that will absorb all those impurities up to 100 to 200 times its weight. Crazy right?

  • Vitamin C Creme is a skin repairing creme concentrated with 20% vitamin C. It’s also light enough it doesn’t leave a heavy or greasy feel. Sign me up! I’m obsessed with everything Vitamin C, btw!

I’m obsessed with each item and each item plays a different role in my routine. I look at the Banisher as magic but since most of you are going to want a real answer as what it is and not just magic, here ya go!

As mentioned above the Banisher is a collagen inducing tool and the way it works is the small bristles on the Banisher is creating micro channels and micro trauma to the skin. Before you freak out, this is a good thing! Once this is done the skin is forced to produce more collagen and heal the skin AKA heal your scars and any other imperfections. It improves the appearance of acne scars, hyperpigmentation, fine lines, wrinkles, gives you a more even skin tone and firmer skin. One of my favorite parts is it actually increases the effectiveness of topical skincare.

So the first step would be to add rubbing alcohol to the cap to cleanse the tool. Very important! You’re going to want to do this on clean, dry skin. I start by pressing the tool onto my face. I like to concentrate on my most troubled areas, my cheeks. Do not use this on any active acne as it will just spread the bacteria, not good! Your face will get red but it will not hurt. Once finished I then apply the Banish Oil which is a vitamin C serum. I LOVE applying a Vitamin C serum after using the Banisher. Vitamin C also helps with scars and hyper-pigmentation so combining the two is a game-changer.

Although I have fixed my consistent adult acne, I do still break out from time to time. That time of the month, stress, eating excessive amounts of sugar, dairy, and gluten. Using the charcoal & pumpkin enzyme mask will help a lot with breakouts!

So with most things, it’s not an overnight fix. It does take some time but it works. It took about 3 months for me to see a big improvement. I still breakout now from time to time and my skin easily scars so I still use this to heal any scarring or hyperpigmentation I have. It’s a game-changer and I’m so excited to get to share it with you!

4T9A8868.jpg
4T9A8846.jpg
4T9A8878.jpg

SHOP MY FAVES

Use the code ‘arielle’ for a discount!